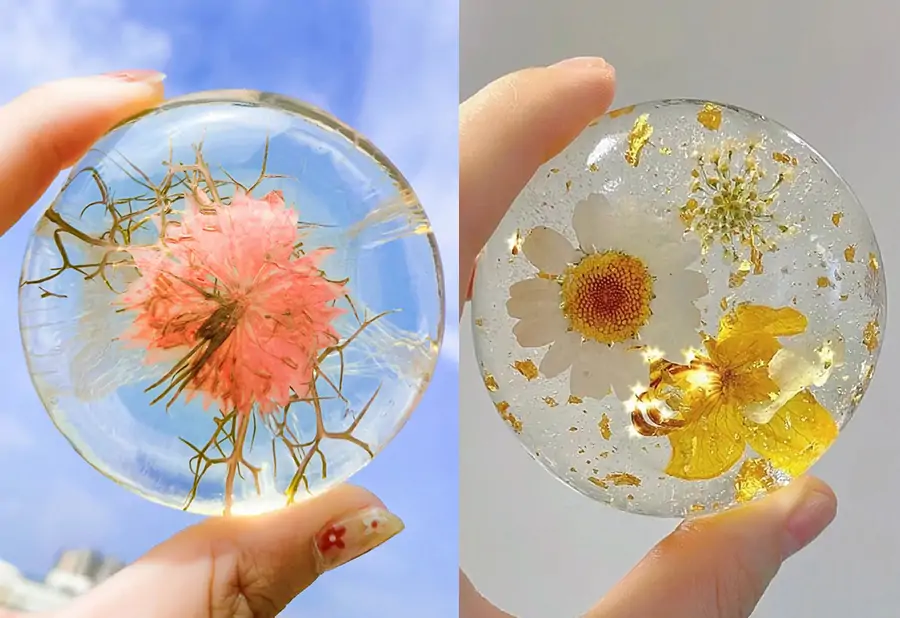
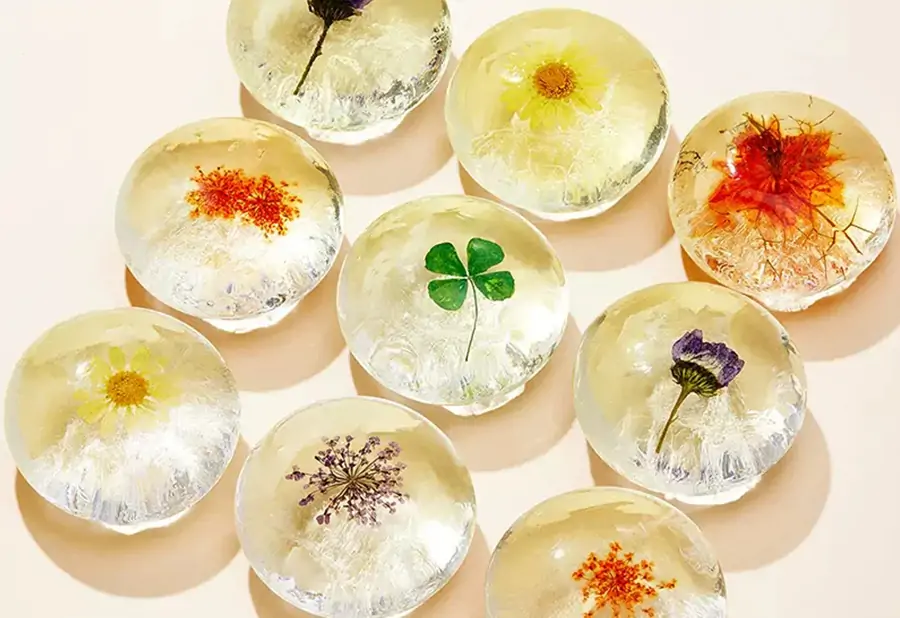
Crafting clear soaps with flowers inside adds an elegant and personal touch to a daily essential. These visually appealing soaps not only serve as a decorative element in the bathroom but also provide a pleasant aroma and gentle cleansing experience. Incorporating flowers into the soap-making process requires careful selection, preparation, and embedding techniques to ensure a beautiful and professional result. This guide explores the importance of crafting clear soaps with flowers inside, the benefits of using them, and a brief overview of the process.
Choosing and Preparing the Flowers
When crafting clear soaps with flowers inside, it is essential to select and prepare the flowers properly. This ensures not only the beauty of the final product but also the safety of those who will use the soap. In this section, we will discuss the types of flowers suitable for embedding, the process of pressing and drying flowers, and important safety considerations and potential allergies.
Types of flowers suitable for embedding
Choosing the right flowers for your clear soap is crucial for a visually appealing and long-lasting result. Some popular options include:
- Roses
- Peonies
- Camellias
- Chrysanthemums
- Lotus
- Sunflowers
- Pansies
It is essential to select flowers with relatively flat petals and avoid those with thick or fleshy petals, as these can make embedding difficult and may not look as appealing in the finished soap.
Pressing and drying flowers
Once you have chosen your flowers, the next step is to press and dry them. This helps to preserve their color and shape, ensuring that they stay beautiful in your soap. To press and dry flowers:
- Place the flowers between two sheets of parchment paper.
- Put the parchment paper with the flowers inside a heavy book or flower press.
- Leave the flowers to press for at least two weeks, checking periodically for dryness.
When the flowers are completely dry, they are ready to be embedded in the soap.
Safety considerations and potential allergies
It is important to remember that some people may be allergic to certain flowers or fragrances used in the soap-making process. To ensure the safety of those who will use your soap, consider the following:
- Avoid using flowers known to cause allergies, such as ragweed or goldenrod.
- Research the properties of the flowers and essential oils you are using to ensure they are safe for skin contact.
- Include a list of ingredients on the packaging of your soap so that users can check for any potential allergens.
By following these guidelines, you can create beautiful and safe clear soaps with flowers inside for yourself or as thoughtful gifts for others.
Materials and Tools Needed
To create beautiful clear soaps with embedded flowers, you will require specific materials and tools. These materials are essential for the process, ensuring a professional result. In this section, we will discuss the materials needed, including the clear soap base, soap molds, pigments and fragrances, and essential tools for soap making.
Clear Soap Base
The foundation of your soap is the clear soap base. This base can be purchased from various suppliers, either online or in local craft stores. It is essential to choose a high-quality, transparent soap base to achieve the desired clarity in your finished product. Glycerin soap bases are typically preferred for their transparency and moisturizing properties.
Soap Molds
Soap molds are used to shape the soap as it cools and solidifies. These molds come in various shapes and sizes, allowing you to create soaps tailored to your preferences. When embedding flowers, it is crucial to choose a mold with enough depth to accommodate the flower without distorting its shape. You can find soap molds made of silicone, plastic, or other materials, but silicone molds are often favored for their ease of use and durability.
Pigments and Fragrances
While the clear soap base will provide transparency, you may want to add a touch of color or fragrance to your soap. Pigments and fragrances can be added in small quantities to achieve the desired effect. It is essential to use soap-safe pigments and fragrances to avoid any adverse reactions or damage to the soap. Be cautious when adding pigments, as too much color can reduce the transparency of your soap.
Essential Tools for Soap Making
Lastly, you will need some basic tools for the soap-making process. These tools include a heat-safe container for melting the soap base, a stirring utensil, a thermometer to monitor the soap’s temperature, and a spray bottle filled with rubbing alcohol to eliminate air bubbles. Additionally, you may want to have a cutting tool and protective gloves on hand for safety and precision during the process.
Making the Clear Soap Base
Making the clear soap base is a crucial step in crafting clear soaps with beautifully embedded flowers. This process involves melting the soap base, adding pigments and fragrances, and ensuring a clear and transparent finish. It is essential to follow each step carefully and maintain the highest quality standards to achieve the desired outcome.
Melting the Soap Base
Start by choosing a high-quality clear soap base. Glycerin-based soap bases are the most popular choice for their transparency and ease of use. Cut the soap base into small cubes to ensure even melting. Using a double boiler or microwave, heat the soap base in short intervals to avoid overheating. Stir the soap base gently between intervals to ensure a smooth and consistent texture.
Adding Pigments and Fragrances
Once the soap base is melted, it’s time to add color and fragrance. For a clear soap with flowers inside, avoid using dark pigments that could obscure the flowers. Instead, opt for subtle and transparent pigments that enhance the soap’s overall appearance. Add the pigments gradually and stir gently to avoid creating bubbles. Similarly, add your chosen fragrance oils or essential oils to the soap base. Make sure to use skin-safe fragrances and follow the recommended usage rates to ensure the soap is safe and enjoyable to use.
Ensuring a Clear and Transparent Finish
Achieving a clear and transparent finish is essential for showcasing the flowers embedded in the soap. To ensure a smooth and bubble-free soap, pour the melted soap base slowly and carefully into the mold. If bubbles appear, use a clean spoon or spatula to gently remove them from the surface. Additionally, spritzing the soap surface with rubbing alcohol can help eliminate bubbles and provide a clear, professional finish.
By following these steps, you’ll create a stunning clear soap base that serves as the perfect canvas for embedding flowers beautifully. The resulting soap will not only be visually appealing but also a delight to use, thanks to the added fragrances and high-quality ingredients.
Embedding the Flowers Beautifully
To achieve a professional and visually appealing look when embedding flowers in your clear soap, it is essential to follow these steps:
Positioning the Flowers in the Soap Mold
Before pouring the clear soap base, arrange the pressed and dried flowers in the soap mold. Take time to carefully position the flowers, ensuring their most attractive side is facing up. Keep in mind the final shape of the soap when positioning the flowers to ensure they are well-centered and evenly distributed.
Pouring the Clear Soap Base
Once the flowers are positioned, slowly pour the clear soap base over them. Pouring slowly and carefully will help to minimize bubbles in the soap and prevent the flowers from shifting out of place. Be sure to pour enough soap base to fully cover the flowers, while also leaving room for the soap to solidify and form a smooth surface.
Techniques for Achieving a Professional Look
To ensure a high-quality finish, consider these tips for embedding flowers in clear soap:1. Use a spray bottle filled with rubbing alcohol to spritz the surface of the soap immediately after pouring. This will help break up any surface bubbles and create a smoother finish.2. Allow the soap to cool and solidify slightly before embedding the flowers. This will help the flowers stay in place and prevent them from sinking to the bottom of the mold.3. Use a skewer or toothpick to gently push the flowers into the desired position if they shift during the pouring process.4. Consider adding a thin layer of clear soap to the bottom of the mold before placing the flowers. This can create a more even surface and prevent the flowers from sticking to the bottom of the mold.By following these steps and techniques, you will create a beautiful and professional-looking clear soap with flowers embedded inside.
Cooling, Unmolding, and Finishing the Soap
Once you have embedded the flowers and poured the clear soap base into the mold, it is time to wait for the soap to solidify. The cooling process is crucial for achieving a high-quality finished product. Ensure that the soap is left undisturbed in a cool, dry place for the recommended amount of time, usually between 4 to 6 hours or until completely solidified.
After the soap has solidified, you can carefully remove it from the mold. Gently release the edges of the soap from the mold, and then slowly push the soap out. If you are using a silicone mold, you can flex the mold slightly to help release the soap. Be cautious when removing the soap, as applying too much force or pressure may cause the soap to crack or damage the embedded flowers.
Once the soap has been successfully removed from the mold, you can proceed to trim any excess or rough edges using a sharp knife or soap cutter. This step ensures that your clear soap with flowers inside has a neat and professional appearance. Additionally, you can decorate the soap by adding ribbons, labels, or other embellishments, especially if you plan to gift your handmade soap to someone.
Storing and Using Your Clear Soap with Flowers Inside
Once you have crafted your beautiful clear soap with flowers inside, it’s important to store and use it properly. This section will provide proper storage techniques, tips for using your soap as decoration, fragrance, or for washing, and ideas for gifting your handmade soap.
Proper storage techniques
To ensure the longevity of your clear soap with flowers inside, it’s essential to store it in a cool, dry, and well-ventilated area. Keep your soap away from direct sunlight and extreme temperatures, as this may cause the soap to melt or discolor. Consider wrapping your soap in wax paper or placing it in an airtight container to prevent it from absorbing moisture and losing its fragrance over time.
Tips for using your soap as decoration, fragrance, or for washing
Your clear soap with flowers inside can serve multiple purposes, making it a versatile addition to your home. As a decoration, place your soap on a soap dish or tray in your bathroom or guest room, allowing the beautiful flowers to be displayed. For fragrance, store your soap in a linen closet or dresser drawer to infuse your linens and clothing with its delicate scent. When using your soap for washing, wet the soap and work it into a lather, gently cleansing your skin with the fragrant and moisturizing soap.
Gifting your handmade soap
Handmade clear soaps with flowers inside make thoughtful and unique gifts for friends, family members, or coworkers. Consider wrapping your soap in decorative paper, placing it in a small gift box, or tying it with a ribbon to enhance its presentation. Include a handwritten note or a small card detailing the scent and flower type, as well as instructions for proper storage and use. Your recipient will appreciate the time and effort you put into creating such a beautiful and functional gift.
Different Soap Flower Styles and Scents
When creating clear soaps with flowers inside, there are various flower styles and scents to choose from. In this section, we will explore popular flower shapes, scents, and provide inspiration for creating a unique soap flower design.
Popular Flower Shapes and Types
There are several flower shapes and types that can be embedded in clear soaps. Some popular options include:
- Rose shape
- Peony flower type
- Camellia type
- Chrysanthemum type
- Lotus shape
- Sunflower shape
- Pansy type
Experiment with different flowers to find the ones that best suit your personal taste and style.
Scent Options for Your Soap Flowers
Adding scents to your clear soap with flowers inside can enhance the overall experience. Some popular scents for soap flowers include:
- Lavender
- Rose
- Lemon
- Green apple
- Cherry blossoms
- Jasmine
- Cedarwood
- Oranges
Feel free to mix and match scents or use essential oils to create a unique fragrance for your soap.
Inspiration for Creating a Unique Soap Flower Design
To create a truly unique soap flower design, consider the following ideas:
- Combine different flower shapes and scents for a more complex and sophisticated soap.
- Experiment with different pigments and colors to create interesting visual effects.
- Add small decorative items like glitter, beads, or small charms to the soap for a touch of personalization.
- Layer multiple flowers in the soap mold for a multi-dimensional design.
- Try using unconventional flowers, such as succulents or ferns, for a more modern and unique look.
Remember, the possibilities are endless when it comes to creating clear soaps with flowers inside. Use your creativity and imagination to craft a one-of-a-kind soap that represents your personal style and preferences.
Final Thoughts and Next Steps
We have covered the process of crafting clear soaps with flowers inside, including choosing and preparing flowers, gathering materials, making the soap base, embedding the flowers, and finishing the soap. Now it’s your turn to create your own beautiful and unique soaps for various purposes such as decoration, fragrance, washing, or gifting.
Ready to dive deeper into the world of soap flowers? Check out our guide on how to choose and use soap flowers for more detailed information on different styles and scents. If you have any further inquiries, don’t hesitate to contact us for assistance.


