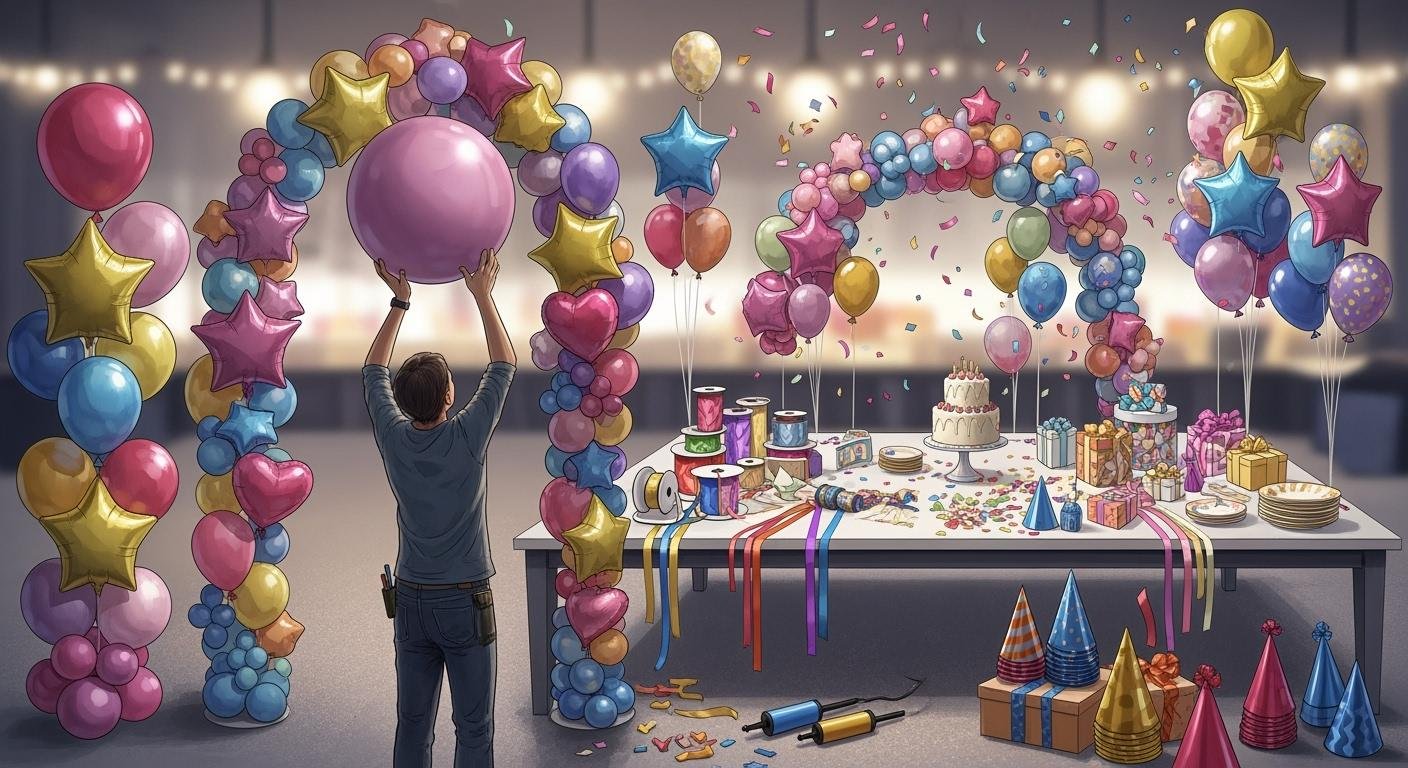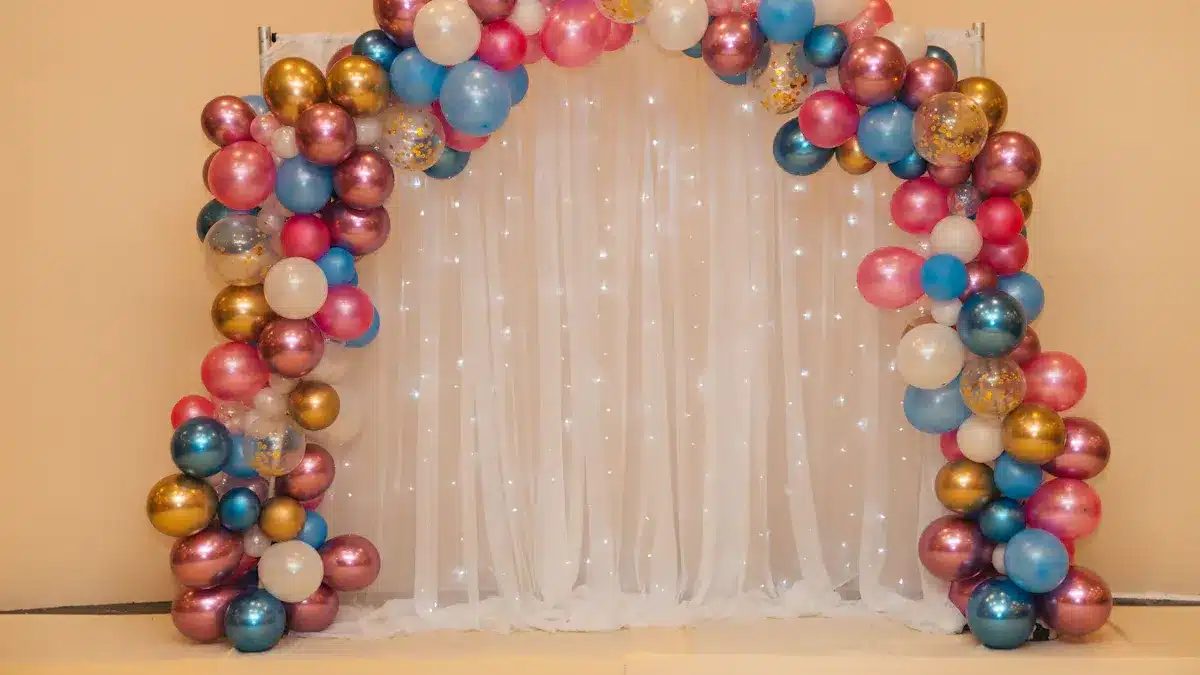
A pink balloon arch can effortlessly turn any venue into an enchanting setting. Whether you’re hosting a baby shower, marking a birthday, or celebrating New Year’s Eve, this delightful balloon arrangement brings a blend of sophistication and joy. You don’t need to be an expert to craft one either. A DIY pink balloon arch is simpler than you might imagine and creates breathtaking balloon décor that will amaze your guests. From weddings to informal get-togethers, this adaptable party decoration suits every occasion. Are you ready to impress your guests with your creative flair?
Key Takeaways
Collect needed items like pink balloons, a pump, and a strip.
Blow up balloons into a teardrop shape for a neat look. Use different sizes for a better design.
Hold the arch steady with hooks or weights to stop it falling, especially outside.
Add extras like flowers, ribbons, or lights to make it prettier and fit your event’s style.
Move the arch safely by splitting it into smaller parts and keeping it cool to stop balloons from popping.
Materials and Tools for a Pink Balloon Arch
Creating a stunning balloon arch starts with gathering the right materials and tools. With a little preparation, you’ll have everything you need to bring your vision to life.
Balloons
Types and sizes of balloons for the arch
To achieve a professional-looking balloon arch, you’ll need balloons in various sizes. Mixing standard-sized balloons with smaller ones adds depth and makes the arch visually appealing. You can also include larger balloons for a dramatic effect. Latex balloons are the most common choice due to their durability and affordability.
Recommended shades of pink for a cohesive look
When it comes to shades, stick to a cohesive palette. Combine soft pastel pinks with vibrant fuchsia or blush tones for a balanced look. Adding metallic pink or transparent balloons can elevate your balloon decoration and give it a modern twist. Using various pink balloons ensures your arch stands out.
Essential Tools
Balloon pump or electric inflator
Inflating balloons by hand can be exhausting. A balloon pump or electric inflator saves time and effort. It also ensures uniform inflation, which is crucial for a polished appearance. Proper inflation prevents overinflation, reducing the risk of balloons popping.
Balloon decorating strip or tape
A balloon garland tape is a game-changer. It simplifies the process of assembling your arch, making it quicker and easier. This reusable tool helps you achieve a professional finish with minimal effort. It’s perfect for crafting arches, garlands, or even columns.
String, fishing line, or wire for support
To keep your balloon arch sturdy, use string, fishing line, or wire. These materials provide extra support, especially for larger or outdoor arches. They’re easy to work with and ensure your arch stays in place.
Additional Supplies
Hooks or stands for securing the arch
Command hooks or adhesive strips are ideal for anchoring your arch to walls or doorways without causing damage. For outdoor setups, consider using balloon weights or sandbags to prevent tipping in the wind. A balloon arch frame or PVC pipe can also provide stability and symmetry.
Adhesive dots or glue for added decorations
Adhesive dots or glue are perfect for attaching smaller balloons or decorative elements like flowers and ribbons. They help fill gaps and add those finishing touches that make your balloon decoration truly unique.
With these materials and tools, you’re all set to create a standard-sized balloon arch that will wow your guests. Whether you’re using a balloon arch kit or sourcing items individually, the right supplies make all the difference.
Step-by-Step Tutorial for Creating a Balloon Arch
Inflate the Balloons
Tips for inflating balloons evenly and securely
Inflating balloons might seem simple, but a few tricks can make a big difference. Always aim for a teardrop shape when inflating latex balloons. This prevents overinflation and reduces the risk of popping. If you’re using helium, pre-inflate the balloons with air first. This helps them adjust to temperature changes. For consistent sizes, use a sizing template. It ensures every balloon looks uniform and professional. On hot days, slightly underinflate the balloons. On cooler days, overinflate them a little to account for temperature shifts.
Practice | Description |
|---|---|
Teardrop Shape | Inflate round latex balloons until they form a teardrop shape to avoid popping. |
Pre-inflate | Pre-inflate balloons with air before using helium to prevent popping due to temperature changes. |
Sizing Templates | Use sizing templates to ensure uniformity in balloon sizes for a professional finish. |
Adjust for Temperature | Slightly underinflate on hot days and overinflate on cool days to accommodate temperature changes. |
Mixing sizes for a dynamic and full appearance
Using balloons of different sizes adds depth and makes your balloon arch visually stunning. Large balloons create a solid base, while smaller ones add texture and detail. Try mixing standard-sized balloons with 5-inch ones for a balanced look.
Balloon Size | Contribution to Arch Appearance |
|---|---|
Big balloons | Create a solid foundation, enhancing structural integrity. |
Smaller balloons | Add depth and complexity, improving visual appeal. |
Assemble the Arch
Attaching balloons to the decorating strip
Assembling the arch is easier than you think. Start by attaching the knotted ends of the balloons through the holes in the decorating strip. Position balloons on both sides of the strip to create clusters. Use dot glue tabs to fill gaps with smaller balloons or add pops of colour.
Attach the knotted end of the balloons through the holes in the tape for secure placement.
Create clusters by positioning balloons on either side of the tape.
Use dot glue tabs to fill in gaps with smaller balloons or different shapes and colours.
Filling gaps with smaller balloons for a polished look
Once you’ve hung the arch, you’ll notice some gaps. Use 5-inch balloons to fill these spaces. Tie four small balloons together to form a ‘quad cluster’. Tuck these clusters into the arch to enhance its texture and make it look complete.
Utilise 5-inch balloons for optimal fitting in snug spaces.
Create ‘quad clusters’ by tying four small balloons together and tucking them into the garland.
Fill gaps after hanging the arch to accurately identify empty spaces.
Secure the Arch
Anchoring the arch to walls, ceilings, or stands
Securing your balloon arch is crucial for stability. Use command hooks or adhesive strips to anchor it to walls or doorways. These won’t damage surfaces and will keep the arch in place. For outdoor setups, use balloon weights or sandbags to prevent tipping. A balloon arch frame or PVC pipe can also provide extra support.
Ensuring stability for both indoor and outdoor use
Indoor arches are easier to stabilise, but outdoor ones need extra care. Add weights at the base of free-standing arches to prevent movement. For windy conditions, fill balloons with air instead of helium. This keeps them steady. Anchoring the structure with sandbags or heavy objects ensures it stays put.
Customisation Ideas for Stunning Balloon Decor
Colour Coordination
Combining pink with complementary colours
Choosing the right colour combination can transform your balloon arch into a visual masterpiece. Pink pairs beautifully with several shades to create a cohesive and elegant look:
Soft pastel tones like mint green or lavender add a dreamy vibe.
Neutral colours such as white, grey, or beige keep the design sophisticated.
Bold contrasts like navy blue or emerald green make the pink pop.
Stick to 2-3 main colours that reflect your event’s theme. For added depth, include metallic or pastel accents. A quick glance at a colour wheel can help you find complementary shades that work best.
Adding metallic or transparent balloons for flair
Metallic and transparent balloons elevate your balloon arch to a whole new level. Metallic pink, gold, or silver balloons add a touch of glamour, while transparent balloons filled with confetti or glitter create a playful yet chic effect. These additions make your balloon garland stand out and feel more luxurious.
Decorative Additions
Incorporating flowers, greenery, or ribbons
Adding natural elements like flowers or greenery can make your balloon arch feel fresh and unique. Use faux or real flowers to match your event’s theme. Greenery, such as eucalyptus or ivy, adds texture and complements the pink tones beautifully. Ribbons in satin or organza can also be tied around the balloons for a whimsical touch.
Using fairy lights for a magical effect
Fairy lights are a simple way to make your balloon arch sparkle. Here’s how you can safely and effectively incorporate them:
Weave the lights loosely between the balloons to avoid straining the wires.
Construct the arch first, then slide the lights in for better placement.
Wrap the lights around the arch and secure them with tape or hooks.
Combine the lights with greenery or ribbons for a personalised, magical effect.
Make sure the plug is out of the way to prevent tripping hazards. This setup works especially well for evening events like weddings or Valentine’s Day celebrations.
Personalisation Tips
Adding names, numbers, or themed elements
Personal touches make your balloon arch unforgettable. You can:
Add letter or number balloons to celebrate milestones like birthdays or anniversaries.
Include a banner with the guest of honour’s name or a special message.
Use themed props, such as tiny stuffed animals for a baby shower or elegant drapery for a wedding.
Customising for specific occasions
Tailor your balloon arch to fit the event. For Valentine’s Day, use red and pink balloons with heart-shaped accents. For a Hawaiian luau, add green and brown balloons to mimic palm trees. You can even incorporate props like inflatable flamingos or small flags to match the theme. Mixing balloon sizes and finishes, like matte and metallic, adds depth and makes your fancy balloon arch truly one-of-a-kind.
Tip: Combining these customisation ideas with your creativity will result in a show-stopping balloon garland that leaves your guests in awe.
Practical Advice for Setup and Maintenance
Troubleshooting Issues
Preventing balloons from popping or deflating
Keeping your balloon arch looking fresh throughout the event requires some simple precautions. Start by storing your balloons in a cool, dark room before use. This prevents colour fading and reduces the risk of popping. Always choose high-quality balloons, as they retain air better and last longer. Tie each balloon securely to minimise air loss and maintain their shape.
To keep your display vibrant, apply a shine solution to the balloons. This not only enhances their brightness but also protects them from dust. During the event, check for sagging balloons and replace them as needed to keep the arch looking flawless.
Fixing gaps or uneven sections in the arch
Gaps or uneven areas can make your balloon arch look incomplete. To fix this, use smaller balloons to fill the spaces. Create clusters of four small balloons and tuck them into the gaps. If certain sections appear uneven, adjust the placement of balloons on the decorating strip. Adding extra balloons in strategic spots can also balance the overall look.
Ensuring Durability
Protecting the arch from heat or sharp objects
Heat and sharp objects are the biggest threats to your balloon arch. Keep the arch away from direct sunlight or hot lights, as heat can cause balloons to expand and pop. For outdoor events, position the arch in a shaded area. Indoors, avoid placing it near heaters or sharp decorations.
Reinforcing the structure for outdoor use
Outdoor setups require extra stability to withstand wind and uneven surfaces. Here are some effective techniques:
Technique | Purpose |
|---|---|
Prevents the arch from tipping over in the wind. | |
Balloon arch frame or PVC pipe | Provides symmetry and stability for larger arches. |
Additionally, fill the balloons with air instead of helium for better stability. Anchor the structure with sandbags or heavy objects to keep it firmly in place.
Setup Considerations
Choosing the best location for the arch
The location of your balloon arch can make or break its impact. For indoor events, place it near the entrance or as a backdrop for photos. Outdoors, choose a flat, shaded area to protect the balloons from heat and wind. Ensure the arch doesn’t block pathways or exits.
Transporting the arch safely if needed
Transporting a balloon arch can be tricky, but breaking it into smaller clusters makes it manageable. Place these clusters in large plastic bags to protect them during transit. Measure the bags to ensure they fit the balloons snugly. Keep the bags sealed to prevent oxidation and maintain the balloons’ shine.
Avoid placing the balloons in the car’s trunk, as heat can cause them to pop. Instead, set the air conditioning to a cool temperature and transport them in the back seat. This ensures your balloon arch arrives at the venue in perfect condition.
Creating a pink balloon arch is easier than you might think. With just a few materials—like balloons, tape, and a pump—you can craft a show-stopping decoration that fits any event. Mixing balloon sizes adds depth, while hooks or weights keep everything stable. Adding greenery, flowers, or fairy lights lets you customise the arch to match your theme.
Why not get creative? Try tying small balloons into ‘quad clusters’ for texture or wrapping lights around the arch for a magical glow. With the right tools and a bit of imagination, you’ll create a masterpiece that wows every guest.
FAQ
How long does it take to make a balloon arch?
Creating a balloon arch usually takes 1-2 hours. The time depends on the size of the arch and your experience. If you’re a beginner, give yourself extra time to inflate and assemble the balloons. Using an electric inflator speeds up the process.
Can I reuse the materials for another event?
Yes, many materials are reusable! Balloon decorating strips, hooks, and stands can be saved for future projects. However, balloons themselves are single-use. To make your arch eco-friendly, consider using biodegradable latex balloons.
What’s the best way to transport a balloon arch?
Break the arch into smaller sections for easy transport. Place the sections in large plastic bags to protect them. Keep the car cool to prevent balloons from popping. Reassemble the arch at the venue for the best results.
How do I keep balloons from popping outdoors?
To prevent popping, keep the arch in a shaded area. Avoid direct sunlight and sharp objects. Slightly underinflate the balloons to allow for expansion in the heat. Use high-quality balloons for better durability.
Can I make a balloon arch without a decorating strip?
Absolutely! You can use string, fishing line, or wire as an alternative. Tie the balloons together in clusters and attach them to the string. While it takes more effort, the result can still look amazing.
Tip: Practice with smaller arches first to build confidence before tackling larger designs.